iOSでPush通知を実装する方法をまとめました。おそらくここを読んでいる方は実機テストをした方だと思いますので実機テストの方法は省きます。
Pushに必要な証明書の作り方を中心に取り上げます。
PushはPHPのライブラリであるapns-phpを使って行います。
最終的にPushに必要な証明書は2つ
最終的に必要になる証明書は2つのみです。
1. ルート証明書
entrust_root_certification_authority.pem
2. サーバ用証明書
server_certificates_sandbox.pem
これを準備するのが大変です。
作り方は同じで cerからpemに変換 という処理が必要になります。これが大変。また、ファイルの名前がはじめどれがどれか分からなくなります。本記事ではデフォルトのファイル名を使って説明しています。最終段階でリネームしますのでご安心を。
CertificateSigningRequest.certSigningRequest を作成
– Macのアプリケーション → ユーティリティ → キーチェインアクセスを起動
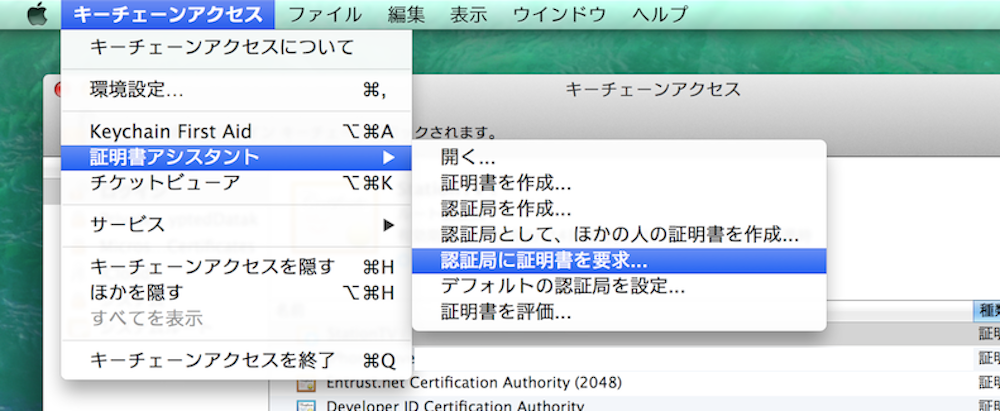
– メニューのキーチェインアクセス→証明書アシスタント→認証局に証明書を要求…
ユーザのメールアドレスと名称を入力します。メールアドレスは一応Apple Developperと同じメールアドレスを入力しました。
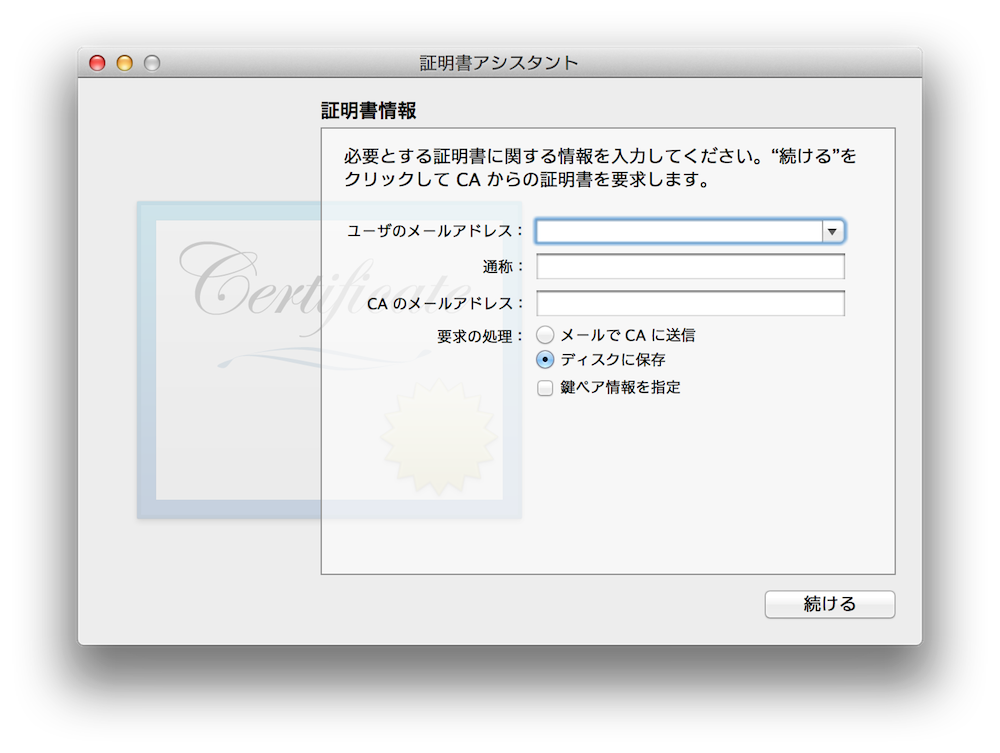
aps_development.cerをCertificateSigningRequest.certSigningRequestから作成
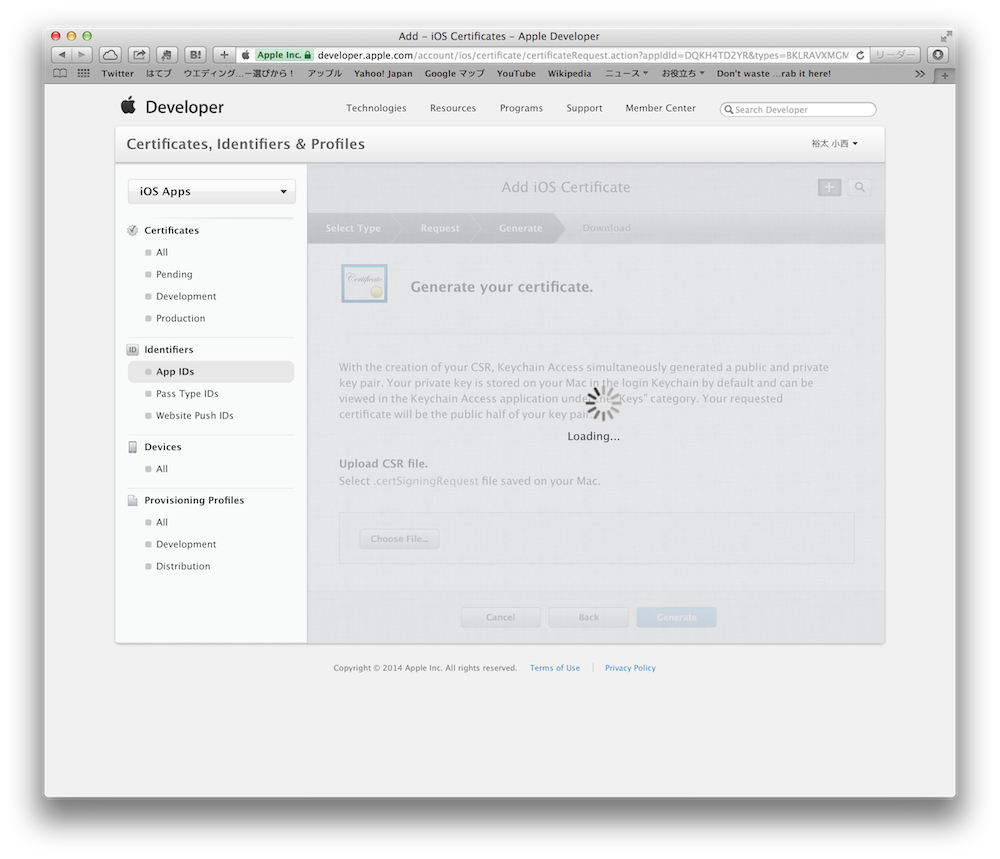
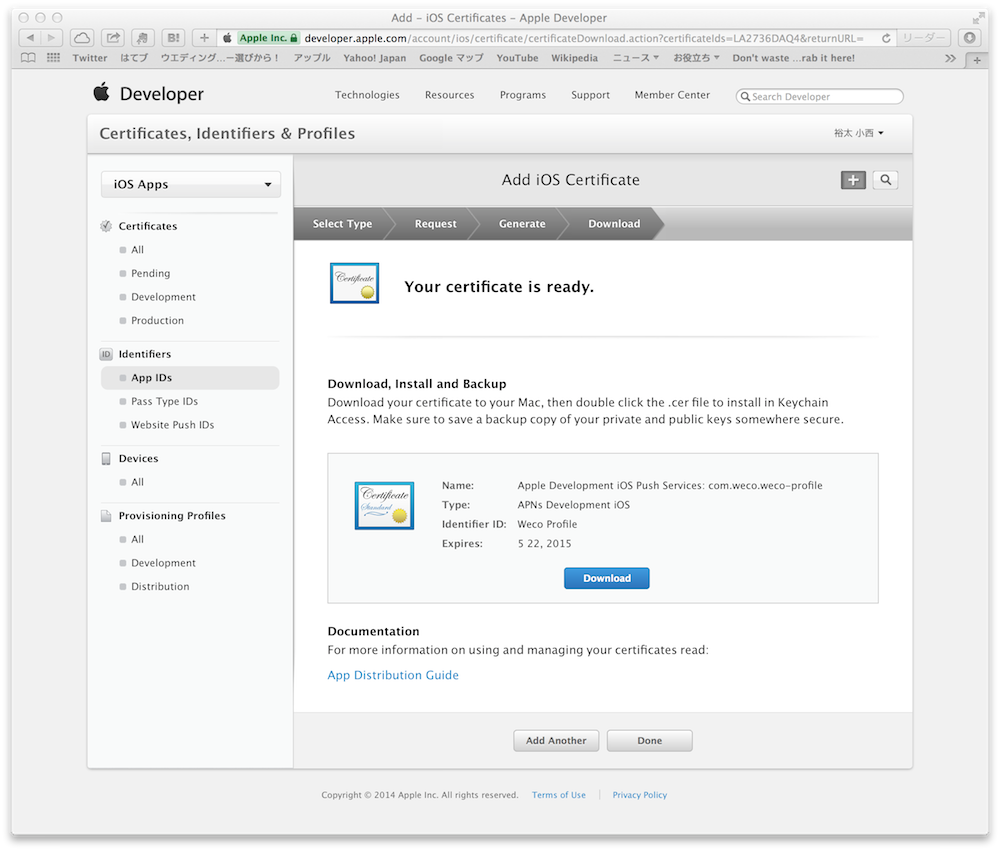
作成した CertificateSigningRequest.certSigningRequest を Apple Developerで aps_development.cer に変換します。
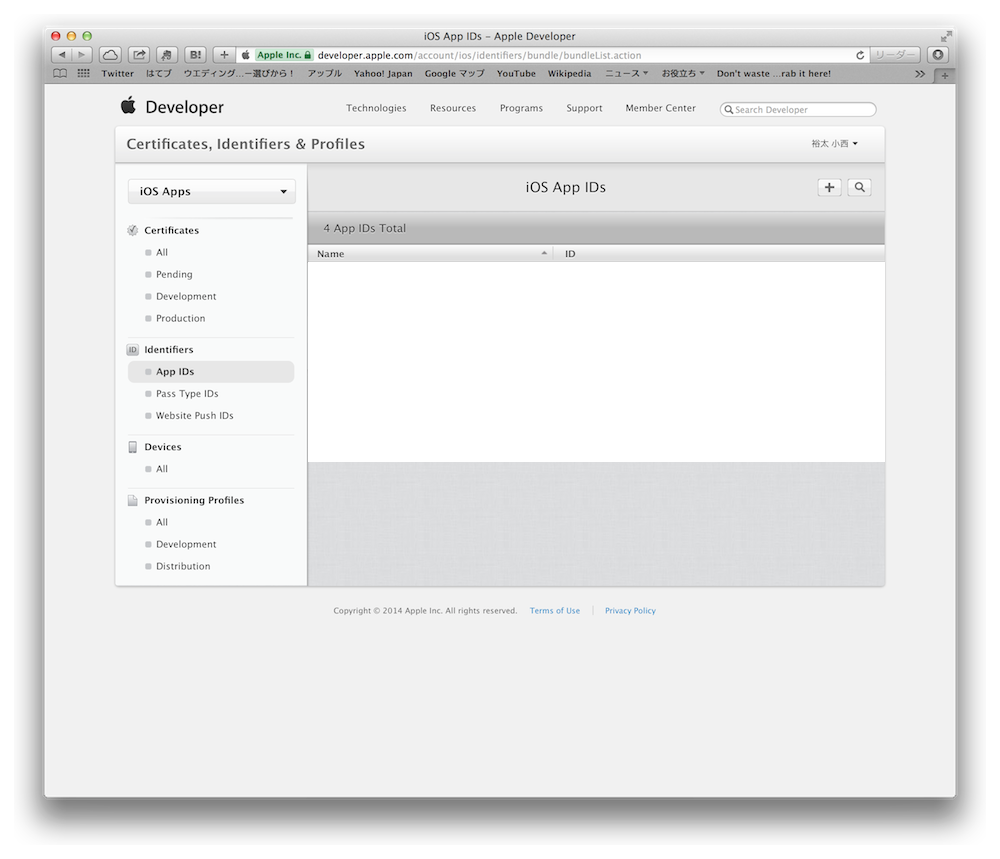
Apple Developerにアクセス。APP IDsから制作中のAPPを選択。
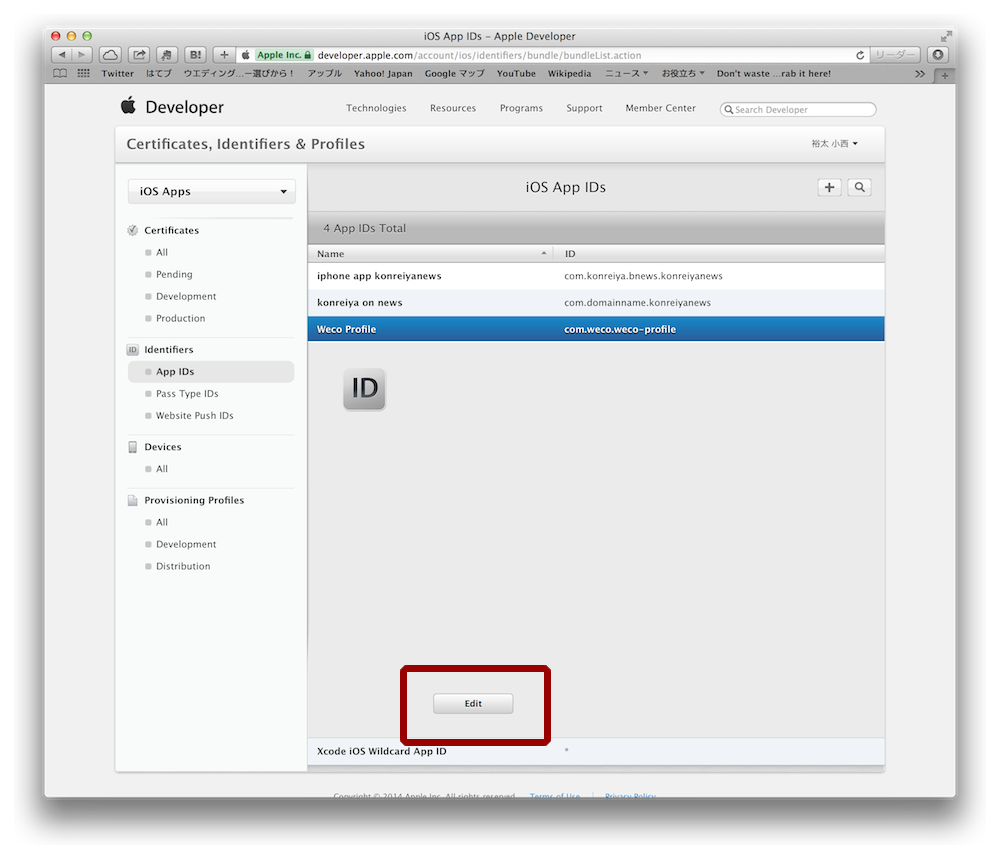
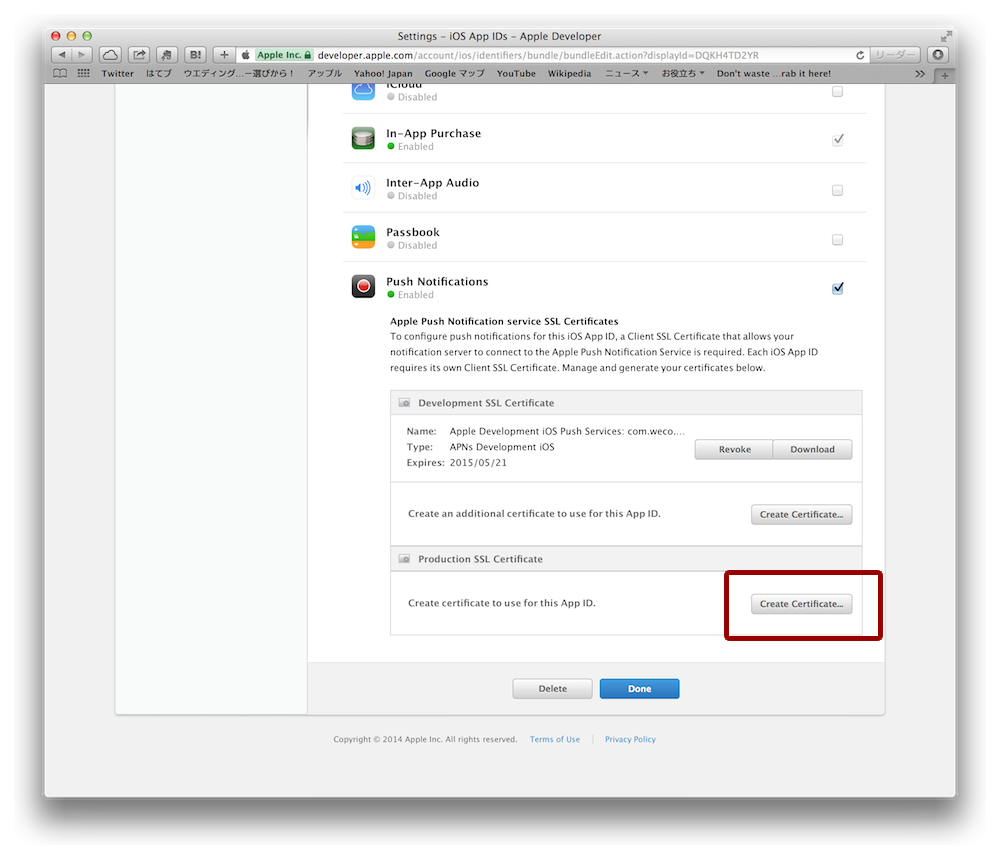
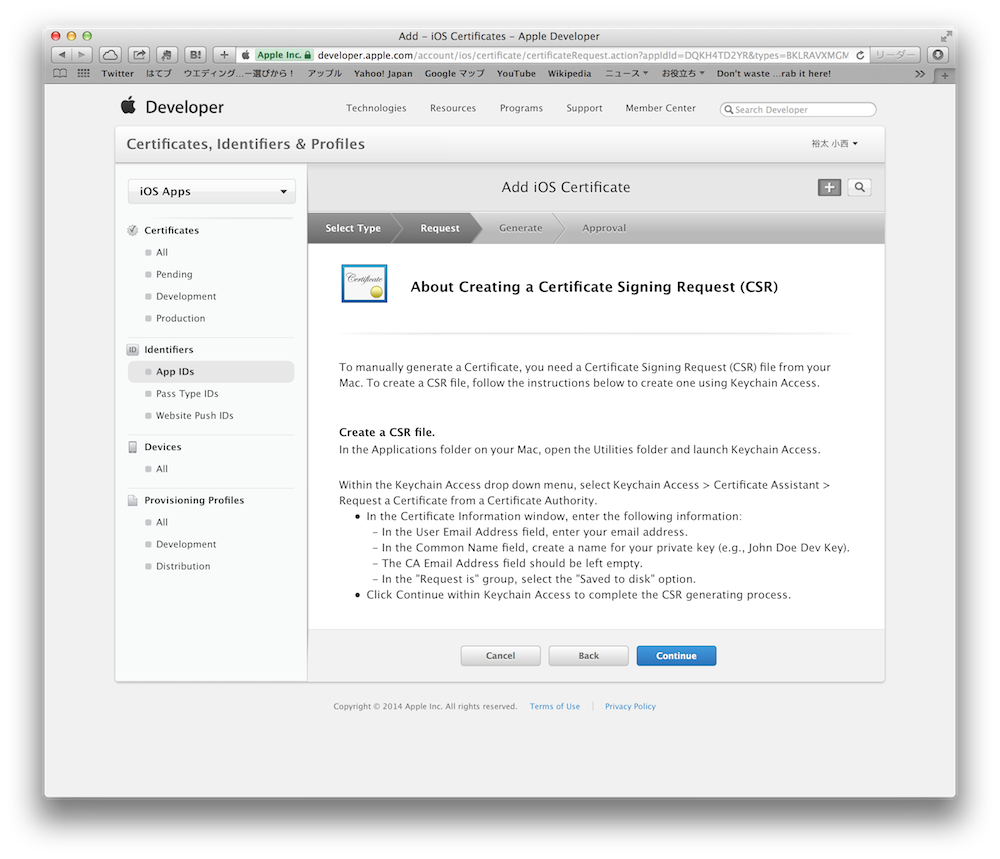
1で作成したCertificateSigningRequest.certSigningRequestをアップロード。
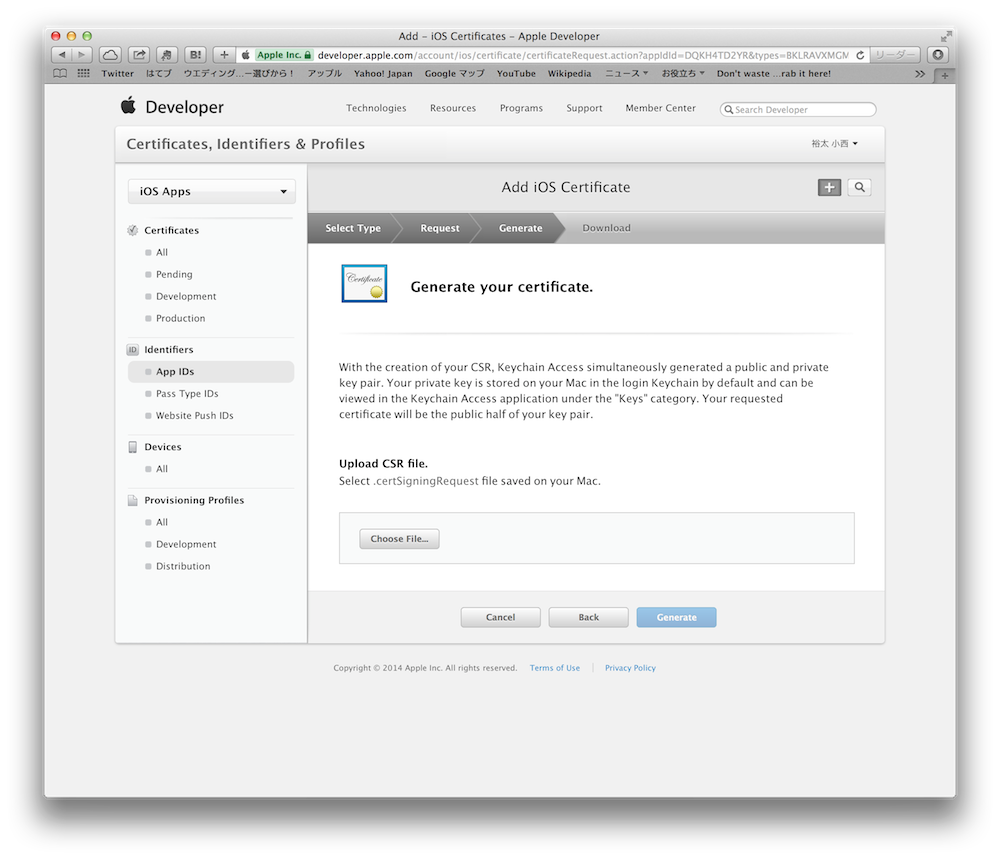
aps_development.cerをDownloadします。
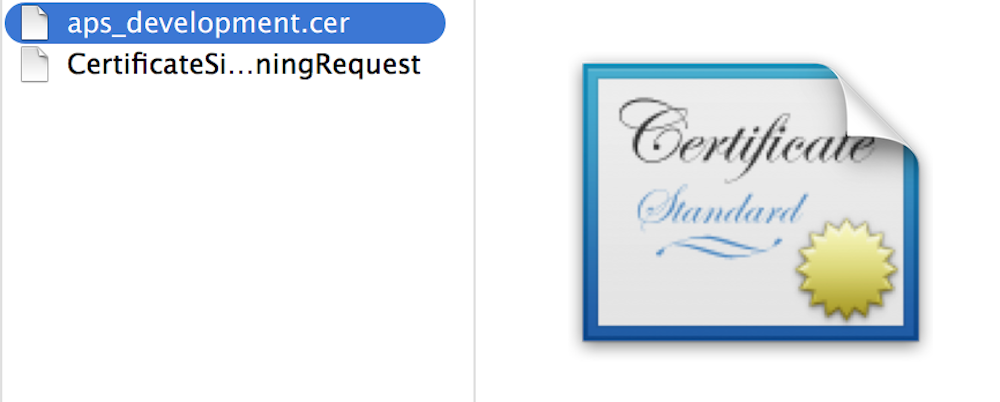
ここまでで作成したファイルは2つです。
ついてこれていますか?
aps_development.cer から server_certificates_sandbox.pem を作成
aps_development.cer をダブルクリックするとキーチェインアクセスが起動します。
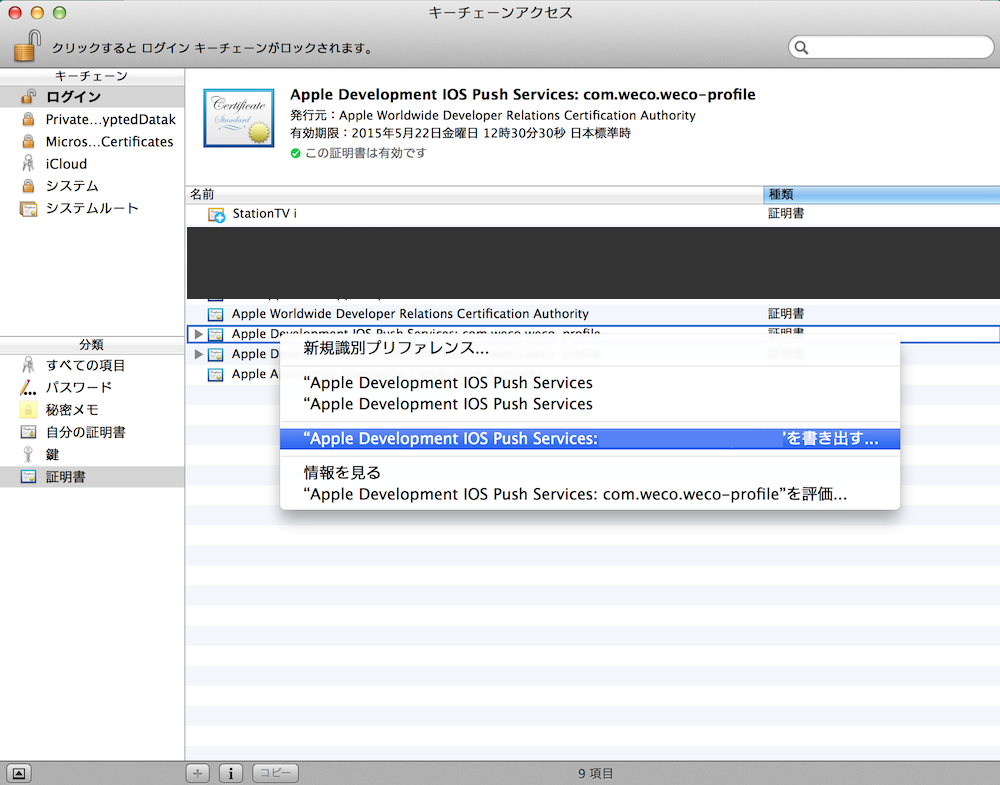
キーチェインアクセスの左側のメニューで「ログイン」「証明書」を選択します。そうすると
Apple Development IOS Push Service: ______
があると思います。これが追加された aps_development.cer になります(何度も挑戦するとどれがどれかわからなくなるので注意を)。
これを書き出しします。
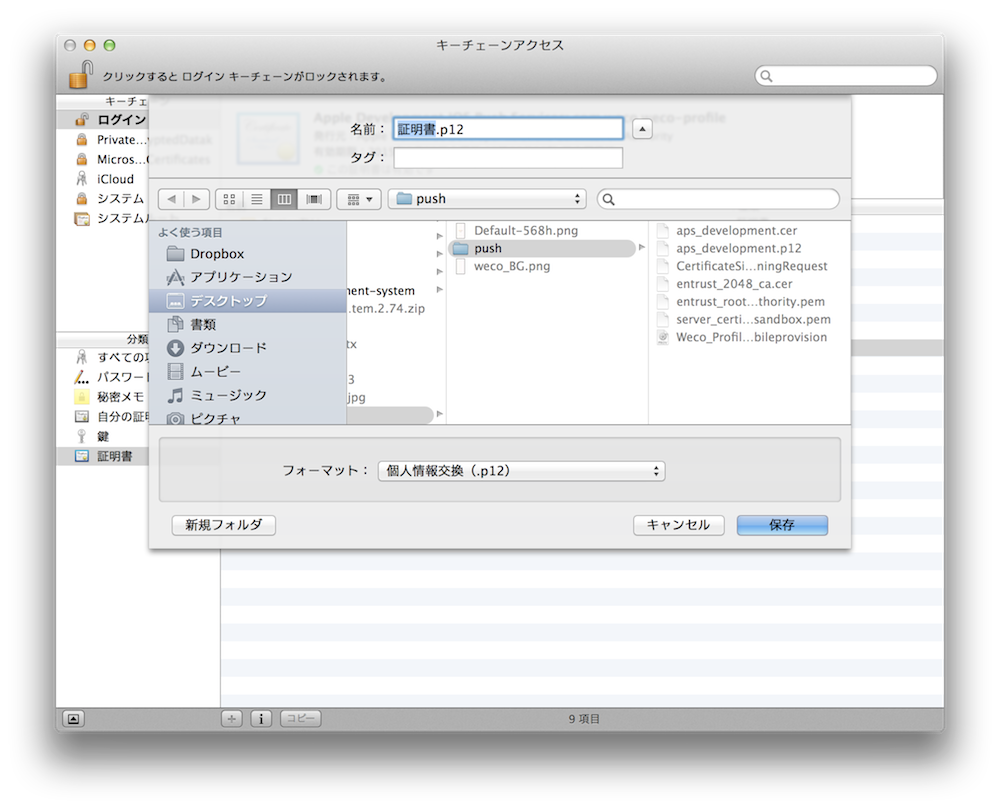
証明書.p12 としてまず書き出しします。
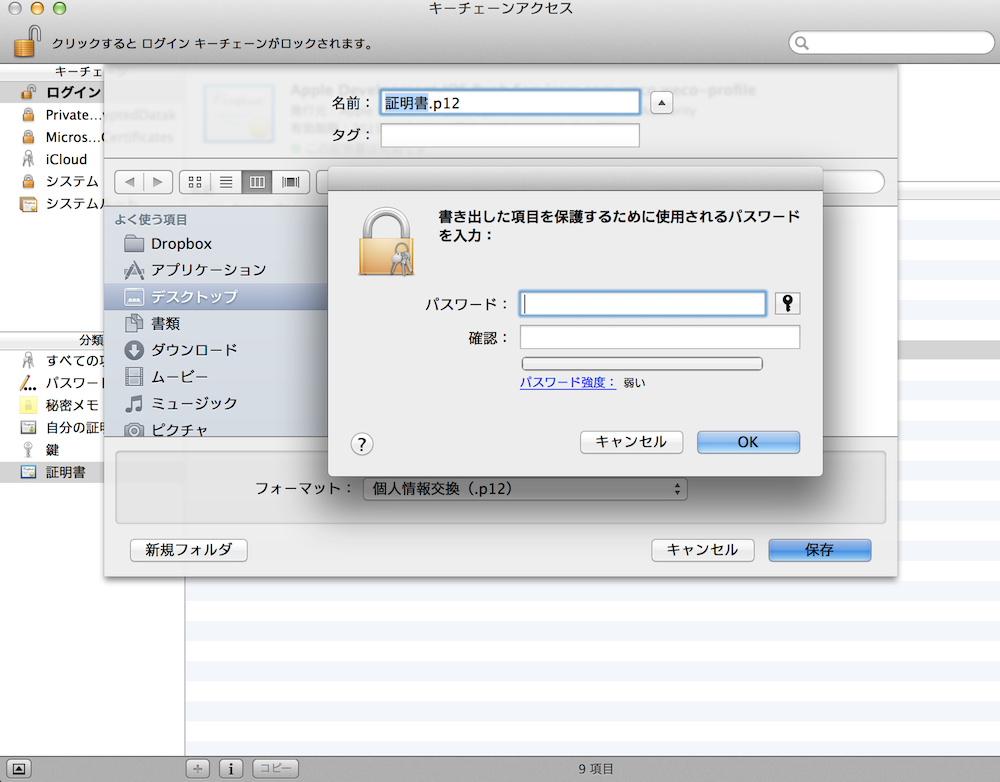
パスワードが求められますが、最初はとりあえずパスワード無しでいいかと思います。
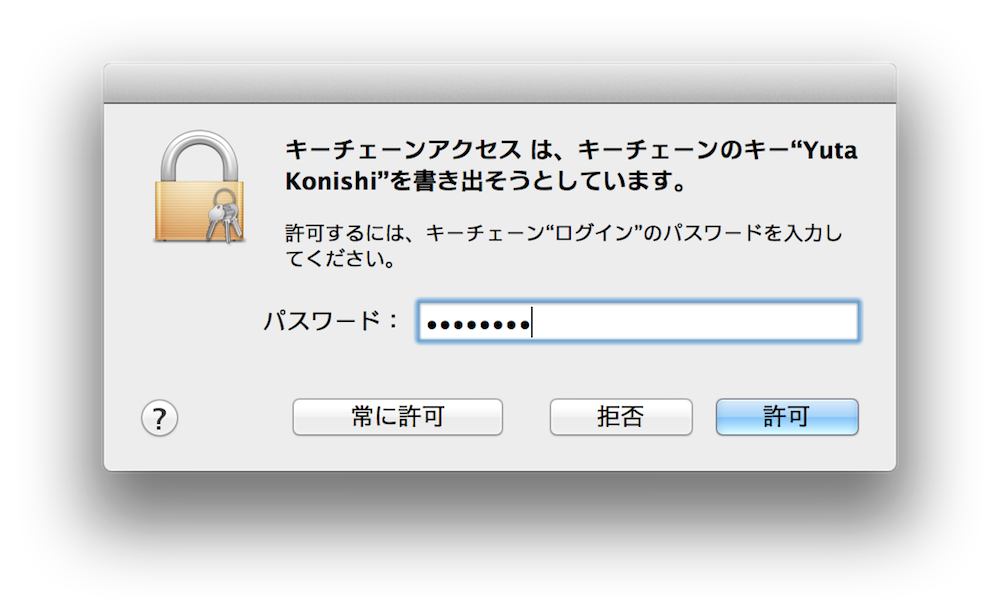
キーの持ち出し大丈夫ですか?ということで管理者のパスワードも求められます。証明書のパスワードとは違うので注意が必要です。
最後にopensslコマンドで 証明書.p12 から server_certificates_sandbox.pem へ変換します。
openssl pkcs12 -in 証明書.p12 -out server_certificates_sandbox.pem -nodes -clcerts
ついてこれてますか?
ルート証明書作成 entrust_root_certification_authority.pem を作成
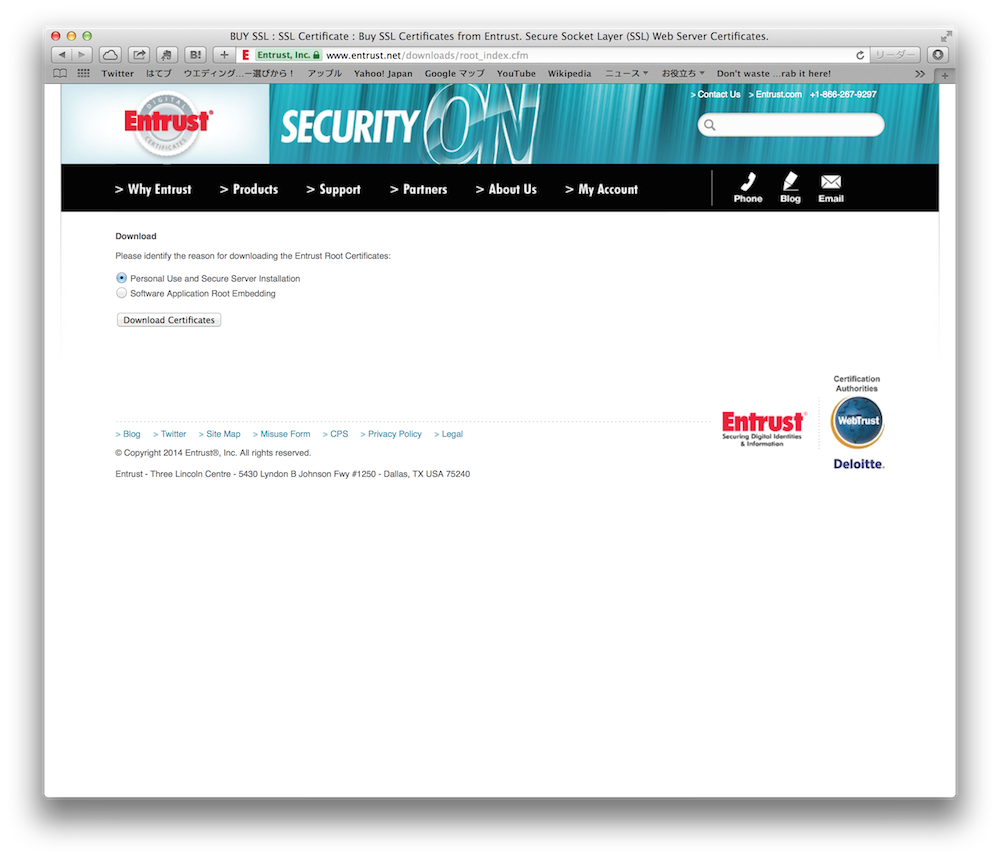
https://www.entrust.net/downloads/root_index.cfm
こちらより Personal Use and Secure Server Installation を選択
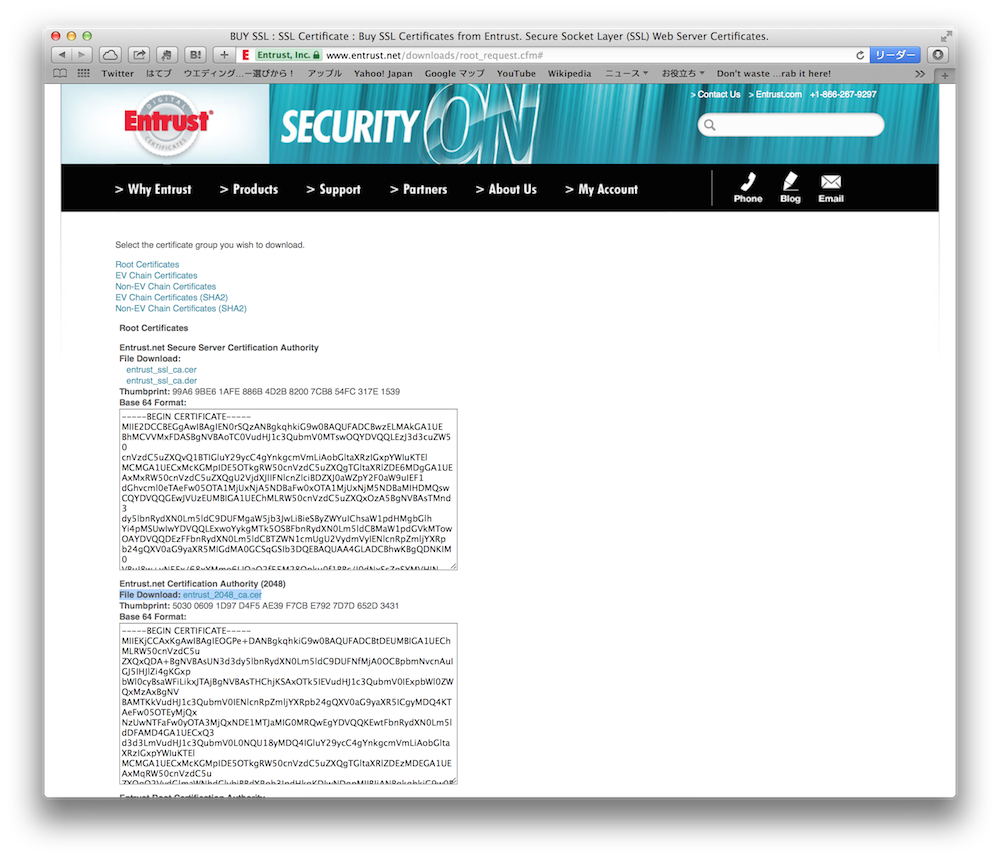
entrust_2048_ca.cer のリンクを探してDownload
entrust_2048_ca.cer をダブルクリックすると キーチェインアクセス が起動します。
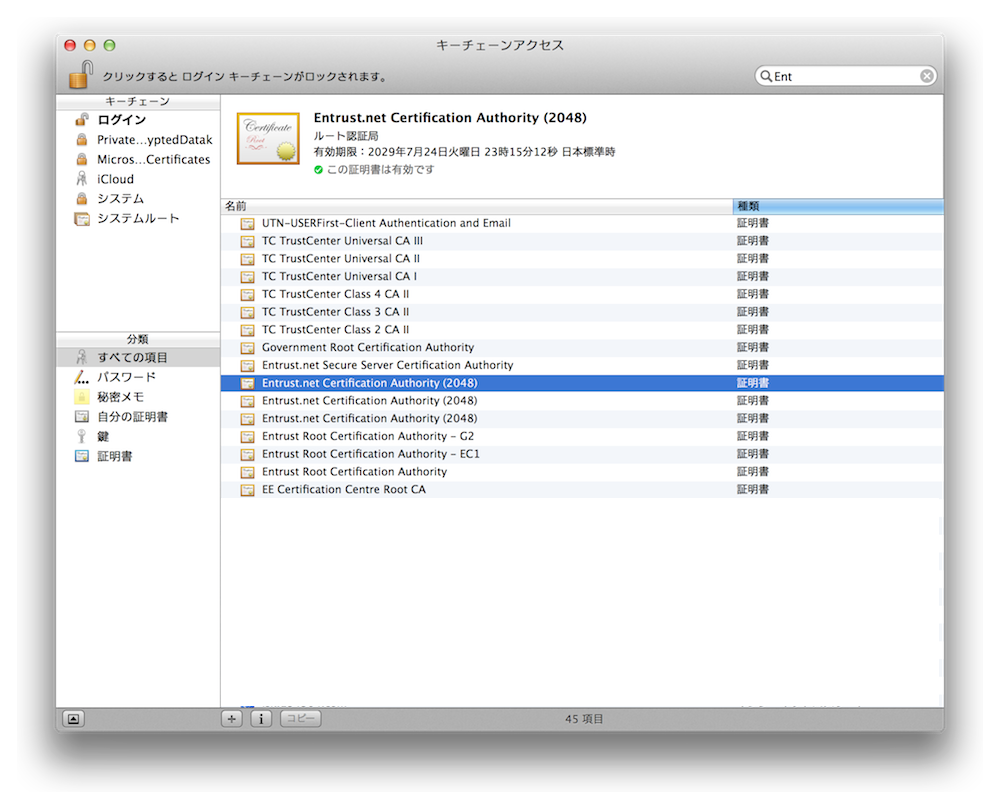
キーチェインアクセスの左のメニュー「ログイン」「すべての証明書」を選び右上の検索窓でキーワード「entrust」を入力。
Entrust.net Certification Authority (2048) を選択・書き出します。
この時重要なのは pem ファイルで書き出しすることです。
書き出しすると Entrust.net Certification Authority (2048).pem になると思いますが、このファイルを entrust_root_certification_authority.pem としてリネームします。
XCode、apns-phpでコード実装
このへんは調べるとすぐにわかり易いサイトが出てくるかと思いますがとりあえず参考に。
ApnsPHPでのsample_push.php ライブラリに添付されていますがちょっとException処理を追加しています。
<?php
require_once 'ApnsPHP/Autoload.php';
$push = new ApnsPHP_Push(
	ApnsPHP_Abstract::ENVIRONMENT_SANDBOX,
	'server_certificates_sandbox.pem'
);
$push->setRootCertificationAuthority('entrust_root_certification_authority.pem'); // 本記事で作成したもの(ルート証明書)

$push->connect();

try{

    $message = new ApnsPHP_Message('デバイスID'); // XCodeで取得したもの <>とスペースを取り除きます
    $message->setCustomIdentifier("Message-Badge-3"); // それぞれのメッセージID
    $message->setBadge(3); // バッジを付けます
    $message->setText('テストメッセージ'); // メッセージを送信
    $message->setSound();
    $message->setCustomProperty('acme2', array('bang', 'whiz')); // 独自に送りたいプロパティ
    $message->setExpiry(30);
    $push->add($message);
    $push->send();

} catch(ApnsPHP_Message_Exception $e){
    print_r( $e->getMessage() );
}
$push->disconnect();

$aErrorQueue = $push->getErrors();
if (!empty($aErrorQueue)) {
	var_dump($aErrorQueue);
}
ポイントはtry, catchすることです。公式のapns-phpライブラリに付いているサンプルではtry, cacheがなくなぜエラーなのかわかりにくいのです。
XCode側
AppDelegate.mで
- (BOOL)application:(UIApplication *)application didFinishLaunchingWithOptions:(NSDictionary *)launchOptions
{
    [application registerForRemoteNotificationTypes: (UIRemoteNotificationTypeBadge|UIRemoteNotificationTypeSound|UIRemoteNotificationTypeAlert)];
    return YES;
}
- (void)application:(UIApplication*)app didRegisterForRemoteNotificationsWithDeviceToken:(NSData*)devToken{
    // デバイストークン送信
    [self sendProviderDeviceToken:devToken];
}
- (void)sendProviderDeviceToken:(NSData *)token
{
    NSString *device_id = [[[token description] stringByTrimmingCharactersInSet:[NSCharacterSet characterSetWithCharactersInString:@"<>"]] stringByReplacingOccurrencesOfString:@" " withString:@""];

    NSURLRequest *request = [NSURLRequest requestWithURL:[NSURL URLWithString: [NSString stringWithFormat:@"http://_________/%@", device_id] ]];

    [NSURLConnection
     sendAsynchronousRequest:request
     queue:[NSOperationQueue mainQueue]
     completionHandler:^(NSURLResponse *response, NSData *jsonData, NSError *error) {
         NSLog(@"Sent Device ID : [%@]", device_id);
     }
     ];

}
- (void)application:(UIApplication *)application didReceiveRemoteNotification:(NSDictionary *)userInfo
{
    // フォアグラウンド
    if (application.applicationState == UIApplicationStateActive)
    {
        NSLog(@"%@", [userInfo description]);
    }
    // バックグラウンド
    if (application.applicationState == UIApplicationStateInactive)
    {
        NSLog(@"%@", [userInfo description]);
    }
}


