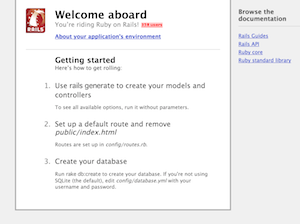
MacOSXでRailsを開発する方法として色々とあるのですがnginx + Passenger + railsという内容が少なかったのでまとめました。
実用となるとPassenger + nginxで運用したほうが色々と便利でして。前提としてMacportsはインストールしておいてくださいね。
gemで必要なモジュール入れます
$ sudo gem install rails
$ sudo gem install jquery-rails
$ sudo gem install sqlite3
$ sudo gem install sass-rails
$ sudo gem install coffee-rails
$ sudo gem install uglifier
$ sudo gem install bundler
nginxをソースから入れます。ここれはprefix指定していませんので、標準の/usr/local/nginxに入ります。
$ sudo mkdir /usr/local/src
$ cd /usr/local/src
$ wget http://nginx.org/download/nginx-1.3.13.tar.gz
$ tar zxvf nginx-1.3.13.tar.gz
$ cd nginx-1.3.13
$ ./configure
gemでPassengerを入れます。passenger-install-nginx-moduleを実行してnginxのmoduleをコンパイルします。
$ sudo gem install passenger
$ passenger-install-nginx-module
passenger-install-nginx-moduleの内容です。入力するところは3箇所。
ソースをダウンロードするかどうかの選択肢 1 or 2ではを。nginxのソースの場所を指定 = /usr/local/src/nginx-1.3.13, nginxのインストール場所を指定 = /usr/local/nginx
Welcome to the Phusion Passenger Nginx module installer, v3.0.19.
This installer will guide you through the entire installation process. It
shouldn’t take more than 5 minutes in total.Here’s what you can expect from the installation process:
1. This installer will compile and install Nginx with Passenger support.
2. You’ll learn how to configure Passenger in Nginx.
3. You’ll learn how to deploy a Ruby on Rails application.Don’t worry if anything goes wrong. This installer will advise you on how to
solve any problems.Automatically download and install Nginx?
Nginx doesn’t support loadable modules such as some other web servers do,
so in order to install Nginx with Passenger support, it must be recompiled.Do you want this installer to download, compile and install Nginx for you?
1. Yes: download, compile and install Nginx for me. (recommended)
The easiest way to get started. A stock Nginx 1.2.6 with Passenger
support, but with no other additional third party modules, will be
installed for you to a directory of your choice.2. No: I want to customize my Nginx installation. (for advanced users)
Choose this if you want to compile Nginx with more third party modules
besides Passenger, or if you need to pass additional options to Nginx’s
‘configure’ script. This installer will 1) ask you for the location of
the Nginx source code, 2) run the ‘configure’ script according to your
instructions, and 3) run ‘make install’.Whichever you choose, if you already have an existing Nginx configuration file,
then it will be preserved.Enter your choice (1 or 2) or press Ctrl-C to abort: 2
——————————————–
Where is your Nginx source code located?
Please specify the directory: /usr/local/src/nginx-1.3.13
——————————————–
Where do you want to install Nginx to?
Please specify a prefix directory [/opt/nginx]: /usr/local/nginx
——————————————–
Extra Nginx configure options
If you want to pass extra arguments to the Nginx ‘configure’ script, then
please specify them. If not, then specify nothing and press Enter.If you specify nothing then the ‘configure’ script will be run as follows:
sh ./configure –prefix=’/usr/local/nginx’ –with-http_ssl_module –with-http_gzip_static_module –with-cc-opt=’-Wno-error’ –add-module=’/Library/Ruby/Gems/1.8/gems/passenger-3.0.19/ext/nginx’
Extra arguments to pass to configure script:
——————————————–
Confirm configure flags
The Nginx configure script will be run as follows:
sh ./configure –prefix=’/usr/local/nginx’ –with-http_ssl_module –with-http_gzip_static_module –with-cc-opt=’-Wno-error’ –add-module=’/Library/Ruby/Gems/1.8/gems/passenger-3.0.19/ext/nginx’
Is this what you want? (yes/no) [default=yes]: yes
~~~~~~~~~~~~~~~~~~~~~~~~~~~~~~~~~~~~~~~~~~~~~~~~~~
~~~~~~~~~~~~~~~~~~~~~~~~~~~~~~~~~~~~~~~~~~~~~~~~~~Nginx with Passenger support was successfully installed.
Please edit your Nginx configuration file (probably /usr/local/nginx/conf/nginx.conf),
and set the passenger_root and passenger_ruby configuration options in the
‘http’ block, like this:http {
…
passenger_root /Library/Ruby/Gems/1.8/gems/passenger-3.0.19;
passenger_ruby /System/Library/Frameworks/Ruby.framework/Versions/1.8/usr/bin/ruby;
…
}After you (re)start Nginx, you are ready to deploy any number of Ruby on Rails
applications on Nginx.Press ENTER to continue.
——————————————–
Deploying a Ruby on Rails application: an example
Suppose you have a Ruby on Rails application in /somewhere. Add a server block
to your Nginx configuration file, set its root to /somewhere/public, and set
‘passenger_enabled on’, like this:server {
listen 80;
server_name www.yourhost.com;
root /somewhere/public; # <--- be sure to point to 'public'! passenger_enabled on; } And that's it! You may also want to check the Users Guide for security and optimization tips and other useful information: /Library/Ruby/Gems/1.8/gems/passenger-3.0.19/doc/Users guide Nginx.html Enjoy Phusion Passenger, a product of Phusion (www.phusion.nl) :-) https://www.phusionpassenger.com Phusion Passenger is a trademark of Hongli Lai & Ninh Bui.
続いてnginxの設定を行います。nginx.confファイルを最小の行数で書くことにします。
$ sudo mv /usr/local/nginx/conf/nginx.conf /usr/local/nginx/conf/nginx.conf.org
$ sudo vim /usr/local/nginx/conf/nginx.conf
nginx.confの内容は下記のとおりです。localhostでサーバを立ち上げます。
worker_processes  1;

events {
    worker_connections  1024;
}
http {
    passenger_root /Library/Ruby/Gems/1.8/gems/passenger-3.0.19;
    passenger_ruby /System/Library/Frameworks/Ruby.framework/Versions/1.8/usr/bin/ruby;
    passenger_max_pool_size 10;
    gzip on;
	server {

	    listen 80;
	    server_name localhost;
	    error_log  logs/error.log;

	    location / {
	        root /var/www/localhost/myproject/public;
	        passenger_enabled on;
	        rack_env development;
	    }

	}
}
railsでプロジェクトを作るだけ。
$ sudo mkdir /var/www/localhost/
$ cd /var/www/localhost
$ rails new myproject
あとはnginxの起動でできあがり。
$ sudo /usr/local/nginx/sbin/nginx
$ curl http://localhost/
Passengerでエラーが出たらまずはモジュールのチェック。dbディレクトリのパーミッションの確認。nginxのrack_env developmentの設定などを確認してみてください。だいたい引っかかるところは同じです。


